

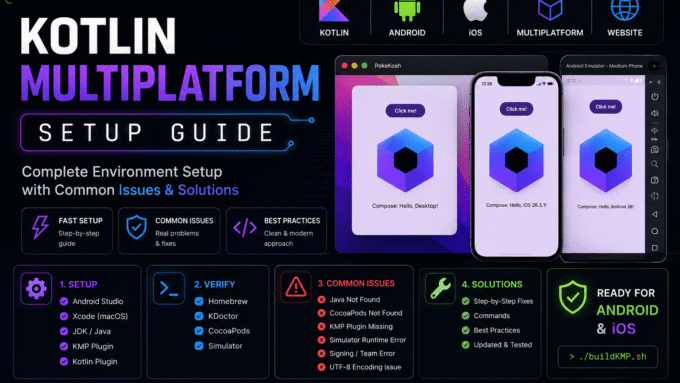
Kotlin Multiplatform Setup

Table of Contents
Kotlin Multiplatform Setup: Install the necessary tool
| Tool | Purpose | Verify Installation | If Not Installed |
|---|---|---|---|
| Android Studio | Main IDE for Android and KMP development. | Open Android Studio or check if it appears in the Applications folder (macOS). | Download and install Android Studio from the official website. |
| Xcode (macOS only) | Required to build and run iOS applications on a simulator or a physical device. Skip this if you’re developing on Windows or Linux. | bash\nxcodebuild -version\n | Install Xcode from the Mac App Store, launch it once, accept the license, and allow it to install additional components. |
| OpenJDK (Java) | Required by Gradle, Kotlin Multiplatform tooling, and other command-line tools. | bash\njava --version\n | If the command is not found, install OpenJDK using Homebrew and configure JAVA_HOME. |
| Kotlin Multiplatform Plugin | Adds Kotlin Multiplatform support to Android Studio. | Android Studio → Settings → Plugins → Search for Kotlin Multiplatform. | Install the plugin and restart Android Studio. |
| Kotlin Plugin | Provides Kotlin language support. It is installed with Android Studio by default. | Android Studio → Settings → Plugins → Verify that Kotlin is enabled. | Normally no action is required. If disabled or missing, update or reinstall Android Studio. |
Verify Your Environment
Once all the required tools are installed, verify your environment using KDoctor.
KDoctor helps you verify whether your Kotlin Multiplatform environment is configured correctly.
Note: KDoctor works only on macOS. If you’re using Windows or Linux, you can skip this step.
Step 1: Check if Homebrew is Installed
Run the following command in the terminal:
brew --version
If you see an output similar to:
Homebrew 6.0.12
you can proceed to the next step.
If you get an error such as:
brew: command not found
install Homebrew first:
if brew not installl u can go to the to this and install it in ur Mac
/bin/bash-c"$(curl -fsSL <https://raw.githubusercontent.com/Homebrew/install/HEAD/install.sh>)"
After installation, verify it again:
brew --version
Step 2: Install KDoctor
Once Homebrew is installed, run:
brew install kdoctor
If KDoctor is already installed, you may see:
Warning: kdoctor is already installed and up-to-date.
Step 3: Verify the Environment
Run:
kdoctor
A healthy environment should report most components with a ✓ status.
Example:
[✓] Operating System
[✓] Java
[✓] Xcode
[✓] Android Studio
If KDoctor reports warnings or errors, refer to the Troubleshooting section.
Troubleshooting
Java Not Found
Error
[✖] Java not found
rishiz@Rushi-MacBook-Air ~ % kdoctor


rishiz@Rushi-MacBook-Air ~ % kdoctor
Environment diagnose (to see all details, use -v option):
[✓] Operation System
[✖] Java
  ✖ Java not found
    Get JDK from <https://www.oracle.com/java/technologies/javase-downloads.html>
[!] Android Studio
  ! Android Studio (AI-253.30387.90.2532.14935130)
    Location: /Applications/Android Studio.app
    Bundled Java: openjdk 21.0.9 2025-10-21
    Kotlin Plugin: 253.30387.90.2532.14935130-AS
    Kotlin Multiplatform Mobile Plugin: not installed
    Install Kotlin Multiplatform Mobile plugin - <https://plugins.jetbrains.com/plugin/14936-kotlin-multiplatform-mobile>
[✓] Xcode
[!] CocoaPods
  ! CocoaPods configuration is not required, but highly recommended for full-fledged development
  ✖ System ruby is currently used
    CocoaPods is not compatible with system ruby installation on Apple M1 computers.
    Please install ruby via Homebrew, rvm, rbenv or other tool and make it default
    Detailed information: <https://stackoverflow.com/questions/64901180/how-to-run-cocoapods-on-apple-silicon-m1/66556339#66556339>
  ✖ cocoapods not found
    Get cocoapods from <https://guides.cocoapods.org/using/getting-started.html#installation>

Conclusion:
  ✖ KDoctor has diagnosed one or more problems while checking your environment.
    Please check the output for problem description and possible solutions.
[✖] Java
Java not found

[!] CocoaPods
System ruby is currently used
cocoapods not found

[✓] Xcode
At first it appeared that Java was the main issue preventing iOS development.
Most off the time if Mac OS update, most likely cause is that the update removed or invalidated the JDK registration. Android Studio still has its own bundled JDK, but your terminal no longer has a system Java.
Solution
Android Studio Already Included Java
KDoctor detected:
Bundled Java: openjdk 21.0.9
This means Android Studio already ships with its own JDK.
However, the terminal environment did not have a system Java installation, which caused KDoctor to fail the Java check.
Install OpenJDK 21
Installed Java:
brew install openjdk@21
Configured:
export PATH="/opt/homebrew/opt/openjdk@21/bin:$PATH"
export JAVA_HOME="/opt/homebrew/opt/openjdk@21"
Verification:
java -version
Result:
openjdk 21
Java issue resolved.
No compatible Apple Simulator Runtime found
No compatible Apple Simulator Runtime found
for used SDK: iphonesimulator26.5
This suggested a mismatch between:
- Installed SDK
- Installed Simulator Runtime
Simulator Investigation
Checked available runtimes:
xcrun simctl list runtimes
Result:
iOS 26.3
iOS 26.5
Both runtimes were installed.
Device Verification
Checked simulator devices:
xcrun simctl list devices
Result:
- iPhone 17 Pro
- iPhone 17 Pro Max
- iPhone 17e
- iPhone Air
- Multiple iPads
All simulators were available and properly registered.
Root Cause
The issue was not actually Java.
Most likely:
- Xcode had recently updated.
- Simulator runtimes were still syncing/registering.
- Diagnostic tools reported stale information.
- Opening Simulator and refreshing Xcode components resolved the issue.
- Android Studio refreshed the available iOS targets.
Afterward, all simulators appeared correctly.
Final Environment Status
[✓] Operating System
[✓] Java
[✓] Android SDK
[✓] Xcode
[✓] Gradle Project
Environment is fully operational.
Remaining Warnings
macOS 26.5+ is not yet supported
Xcode 26.5+ is not yet supported
These are compatibility warnings from tooling.
They mean:
The diagnostic tool has not officially validated the newest macOS/Xcode version yet.
They do NOT mean:
KMP or iOS development is broken.
Since:
- KDoctor passes
- Simulator launches
- iOS devices are visible
- Gradle project validates
- KMP project runs
these warnings can be safely ignored.
Notes About Java
Android Studio already contains:
openjdk 21.0.9
For Android-only development, a separate system JDK is often unnecessary.
However, some command-line tools such as:
- Gradle
- KDoctor
- KMP CLI tools
expect a system Java installation.
Therefore keeping OpenJDK 21 installed is generally recommended unless disk space is extremely limited.
launch the iOS Simulator on your Intel Mac:
Method 1 — Using Spotlight (Fastest)
Press:
Command (⌘) + Space
Type:
Simulator
Open:
iOS Simulator
Method 2 — From Xcode
Open Xcode
Then go to:
Xcode → Open Developer Tool → Simulator
Method 3 — Using Terminal
Run:
open-a Simulator
If Simulator is not installed
You need Xcode installed.
You can install it from:
- Mac App Store – Xcode
After installing Xcode once:
- Open Xcode
- Accept license
- Let it install additional components
Then Simulator will work.
To run your app in Simulator
Inside Xcode:
- Open your iOS project
- At top toolbar choose a device like:
- iPhone 16
- iPhone SE
- iPad
- Press:
Command (⌘) + R
or click ▶ Run.
Useful Simulator shortcuts
| Action | Shortcut |
|---|---|
| Home button | Command + Shift + H |
| Screenshot | Command + S |
| Rotate device | Command + Left/Right Arrow |
| Toggle dark mode | Features → Appearance |
| Shake device | Device → Shake |
For KMP / Compose Multiplatform projects
If you are running from Android Studio or IntelliJ:
First start Simulator manually:
open-a Simulator
Then run:
iosApp
or select the iOS run configuration from the IDE.
Changing the Default iOS Simulator
By default, running the following command:
open-a Simulator
launches the Simulator application and restores the last used simulator device (for example, iPhone 16).
If you want to change the simulator that opens by default:
- Launch the Simulator:
open-a Simulator
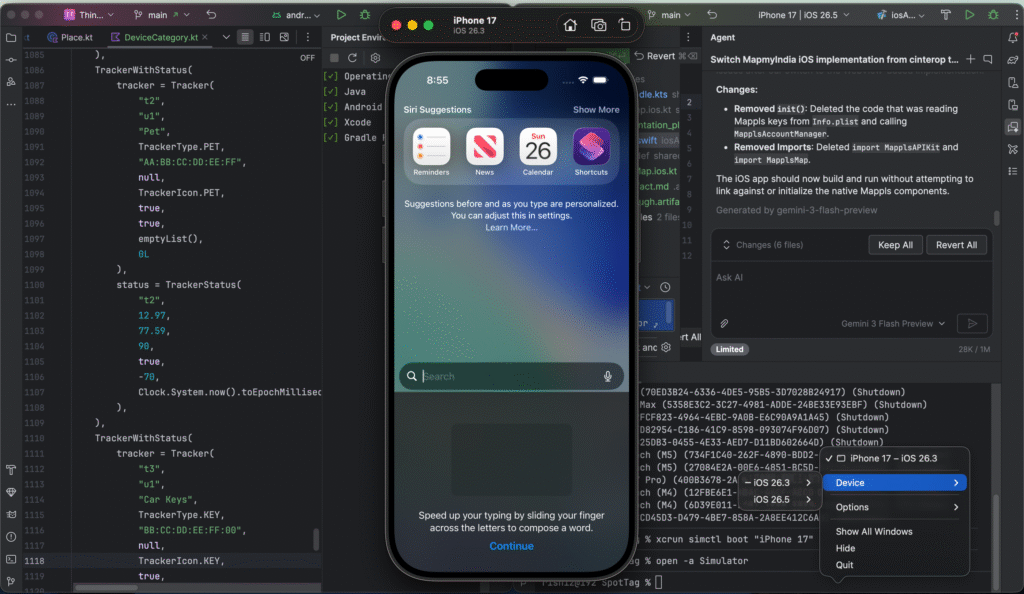
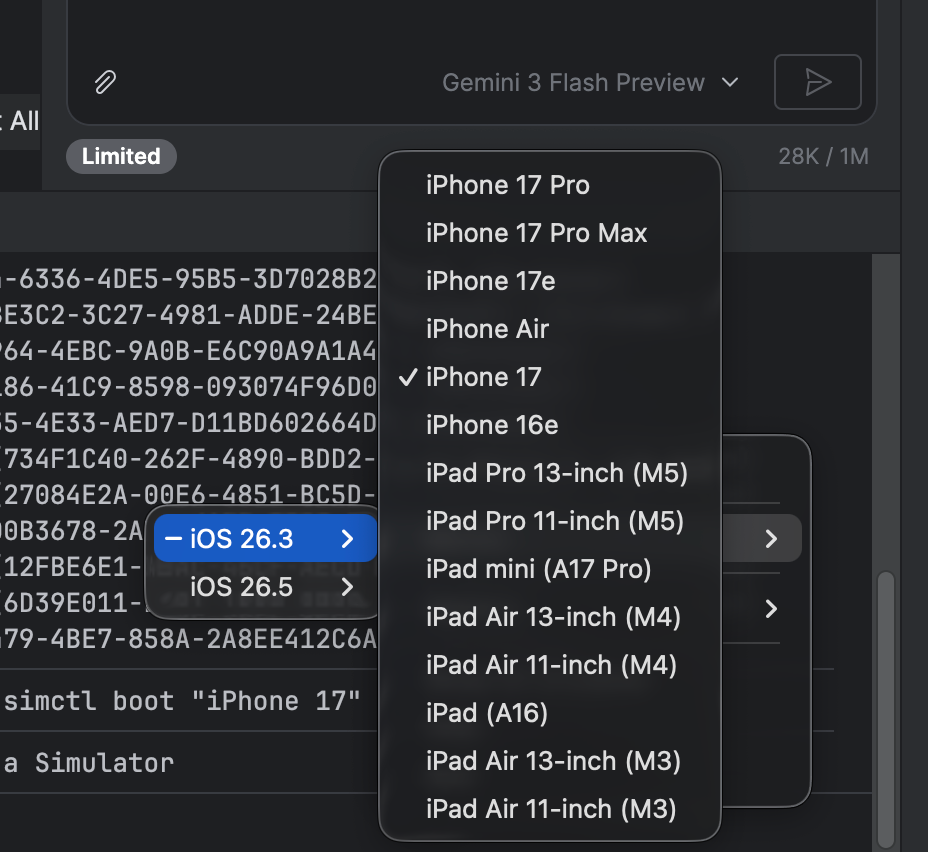
- Right-click the Simulator icon in the macOS Dock.
- Select the desired device from the menu:
Device → iPhone 17(or any other simulator you want to use). - Close the Simulator.
The next time you run:
open-a Simulator
the Simulator will open with the last selected device (e.g., iPhone 17).
Launch a Specific Simulator from the Terminal
Instead of relying on the last used device, you can boot a specific simulator directly.
Example (using the simulator UUID):
xcrun simctl boot B5D25DB3-0455-4E33-AED7-D11BD602664D
open-a Simulator
Or shut down all simulators first and then boot the required one:
xcrun simctl shutdown all
xcrun simctl boot B5D25DB3-0455-4E33-AED7-D11BD602664D
open-a Simulator
This ensures that the specified simulator (e.g., iPhone 17) is launched instead of the previously used device
on click on arrow u will get the devices .